How to Automatically Detect Opt-Out Requests in CRM Messages Using Zapier and OptOut AI

New TCPA regulations taking effect on April 11, 2025 require businesses to honor all opt-out requests, not just those containing “STOP.” OptOut AI ensures compliance by detecting opt-out requests based on the new regulations. This guide will walk you through setting up an OptOut AI + Zapier automation to identify opt-out messages within your CRM and update your system automatically.
What You Need to Get Started
Before setting up this automation, make sure you have:
- Zapier account
- CRM that connects with Zapier (e.g., HubSpot, Salesforce, Pipedrive, Zoho)
- Formcertify account (for OptOut AI) Sign up here
How This Automation Works
When a new message is logged in your CRM:
- Zapier detects the new message (e.g., a lead replies via SMS).
- OptOut AI analyzes the message to detect if it contains an opt-out request ("Take me off your list", "Please no more msgs", etc).
- Zapier takes action - such as marking the contact as opted out, stopping future messages, or notifying your team.
Setting Up Your Zapier + OptOut AI Integration
Let's walk through creating this automation step by step:
Step 1: Connect Your CRM or Messaging Platform to Zapier
- Log in to your Zapier account and click "Create Zap."
- For your trigger, search for your CRM (e.g., HubSpot, Salesforce).
- Select the appropriate trigger event, such as "New Message Received"
- Connect your CRM account if you haven't already.
- Test the trigger so Zapier can detect the "Message" field from your CRM
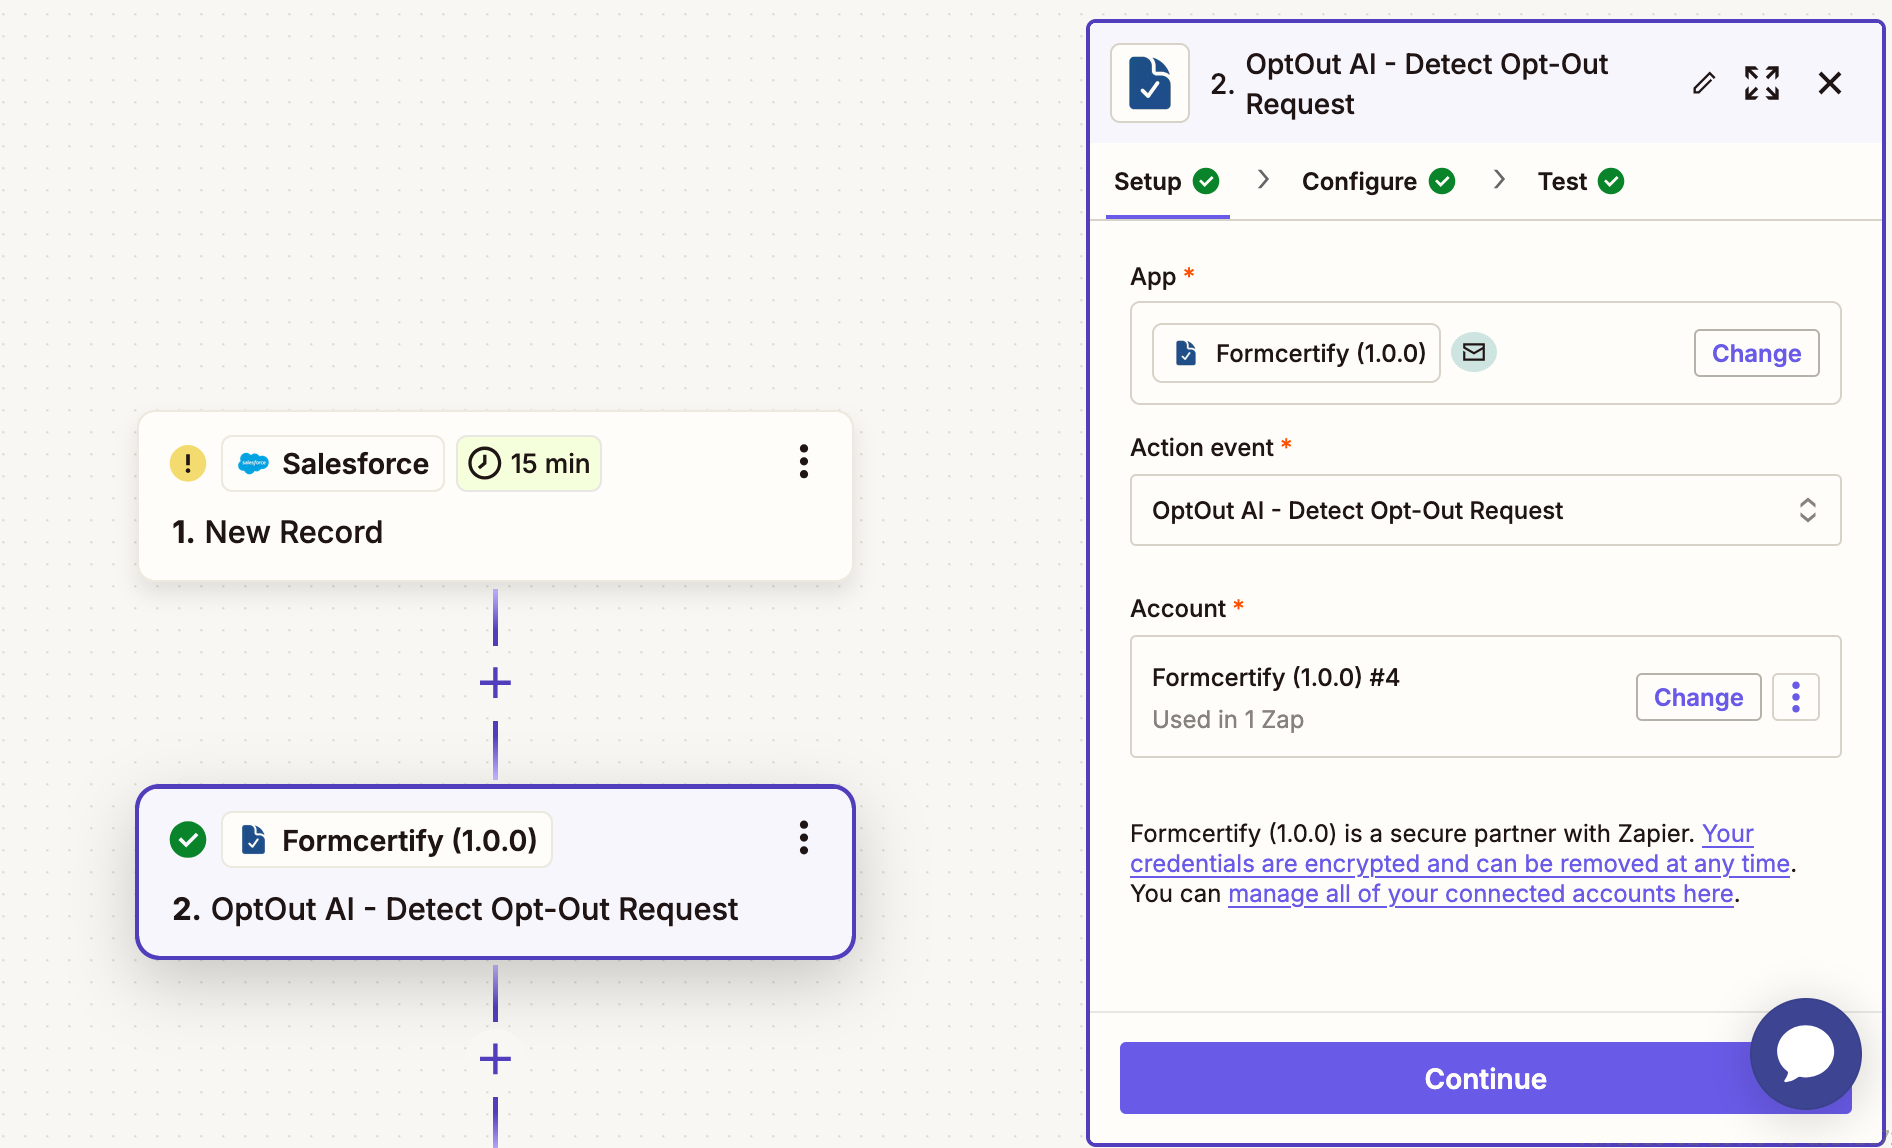
Step 2: Add OptOut AI as an Action
- Click the plus icon to add an action step.
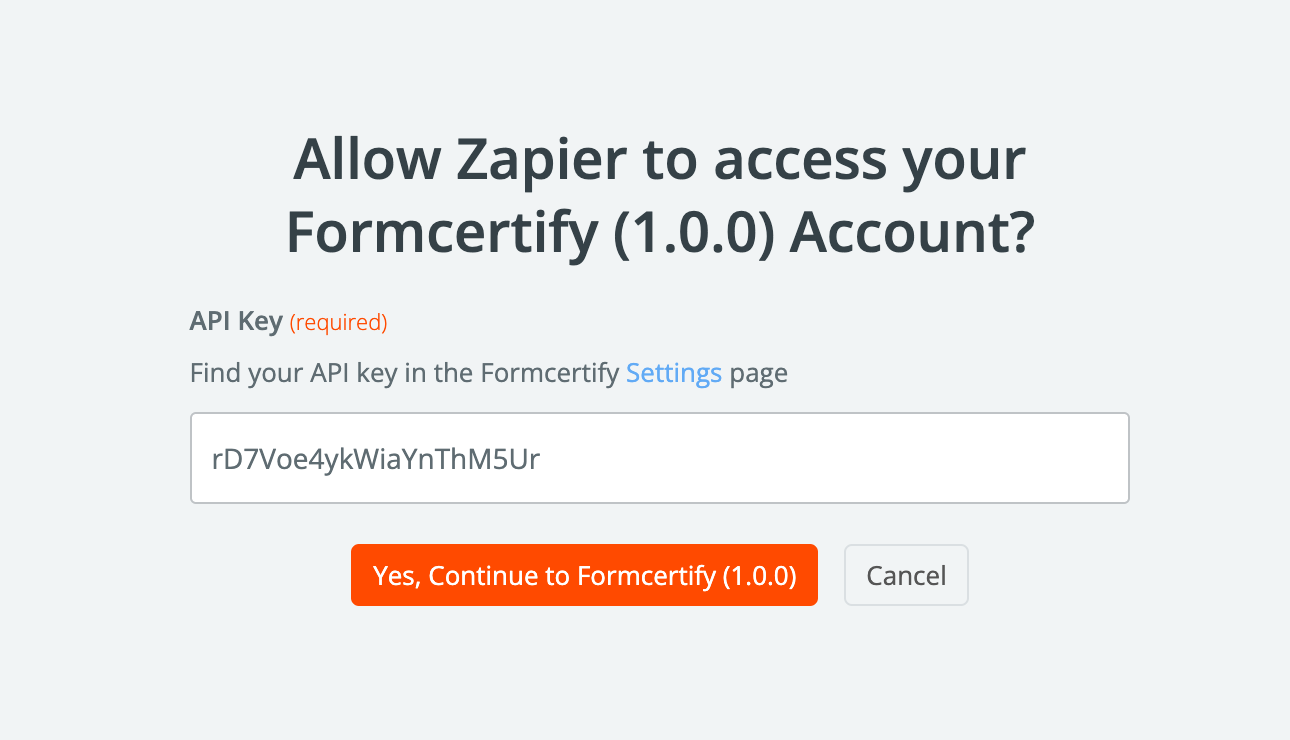
- Activate the Formcertify OptOut AI integration here
- Select "OptOut AI - Detect Opt-Out" as your action.
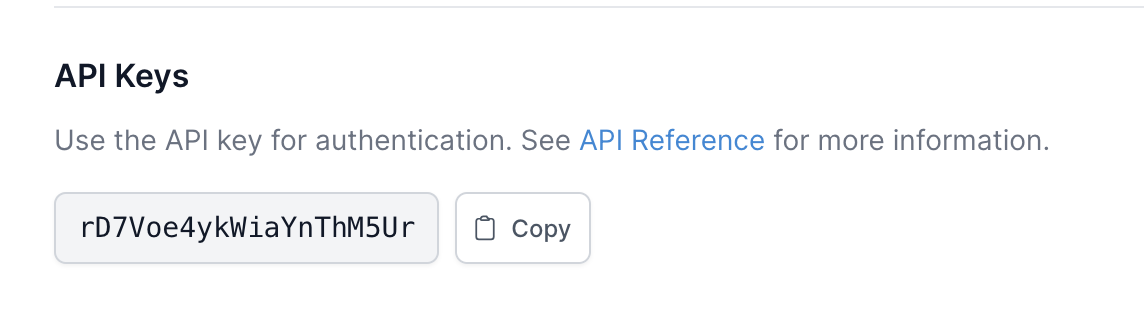
- Copy your API key in the OptOut AI settings.
- In the zap, paste the API key into the "API Key" field
- In the "Message Body" field, map the message field from your CRM trigger
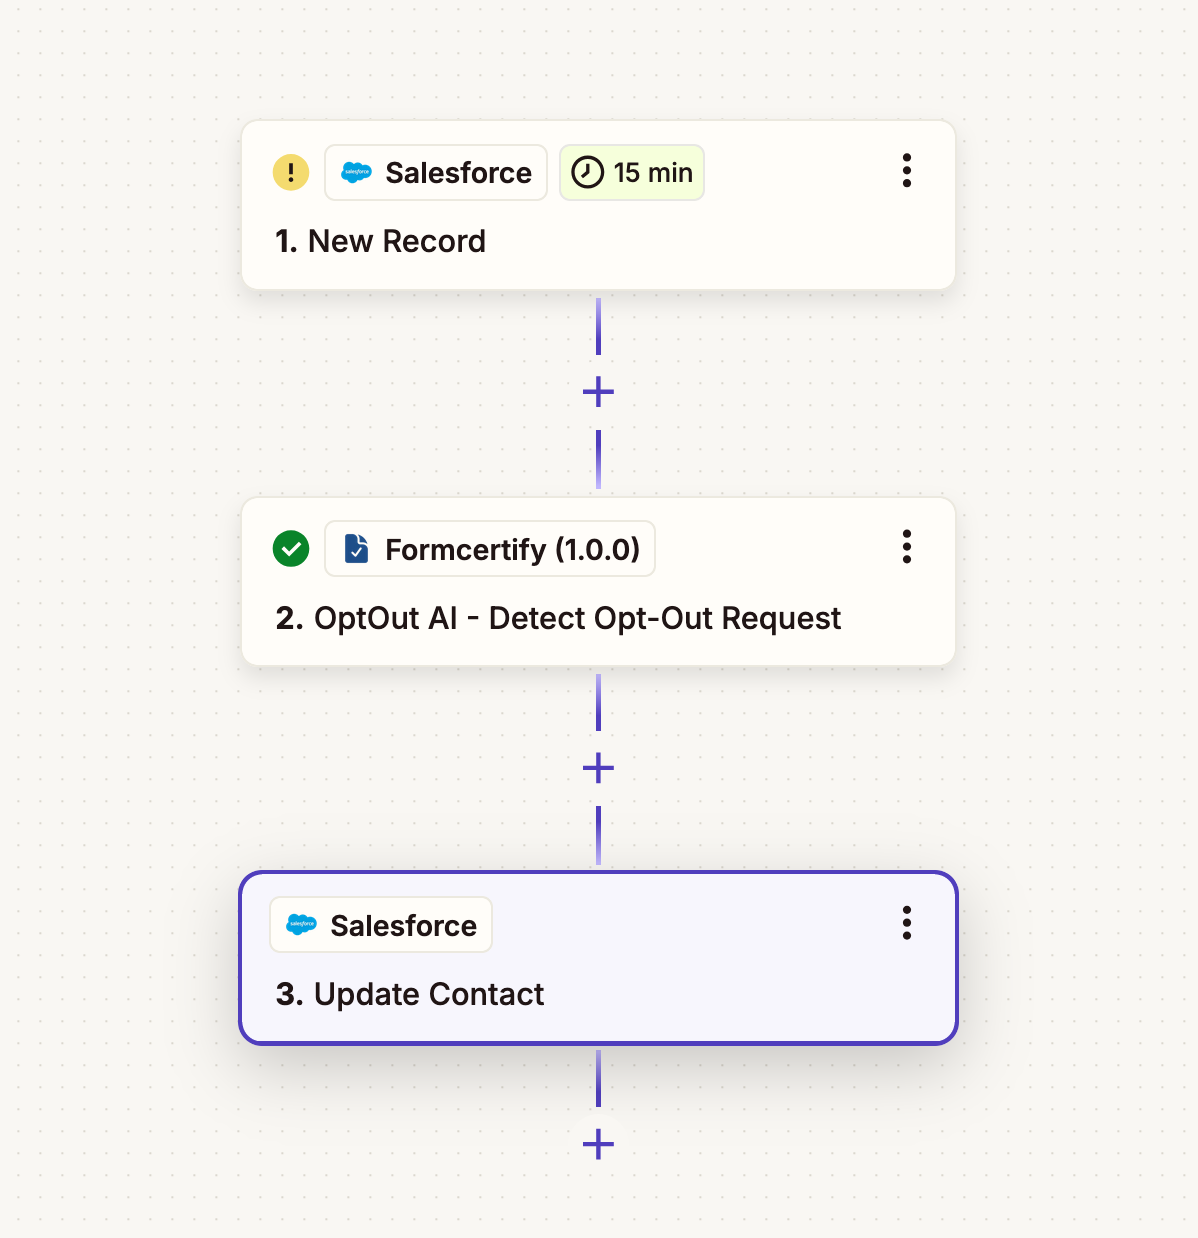
Step 3: Update your CRM with the Opt-out Detected Value
You'll want to update your CRM with the opt-out detected value. This way your CRM can reference that field and prevent future messages from being sent.
- Add an action to update your CRM contact
- Map the "Opt-Out Detected" field to the field in your CRM that you want to update
- Test the Zap to make sure it's working as expected
Conclusion
Failing to honor opt-out requests can lead to serious compliance violations, including hefty TCPA fines and legal consequences. By automating opt-out detection with Zapier and OptOut AI, you ensure that every opt-out request is identified and processed instantly - without human error or delays.
Sign up and start building your Zapier integration.
Ready to try Formcertify?
Protect your business and start issuing digital consent certificates for free
Try Now FreeWant to Partner With Us?
Join our partner program and earn 25% revenue share for life on your referrals
Learn More